Beranda
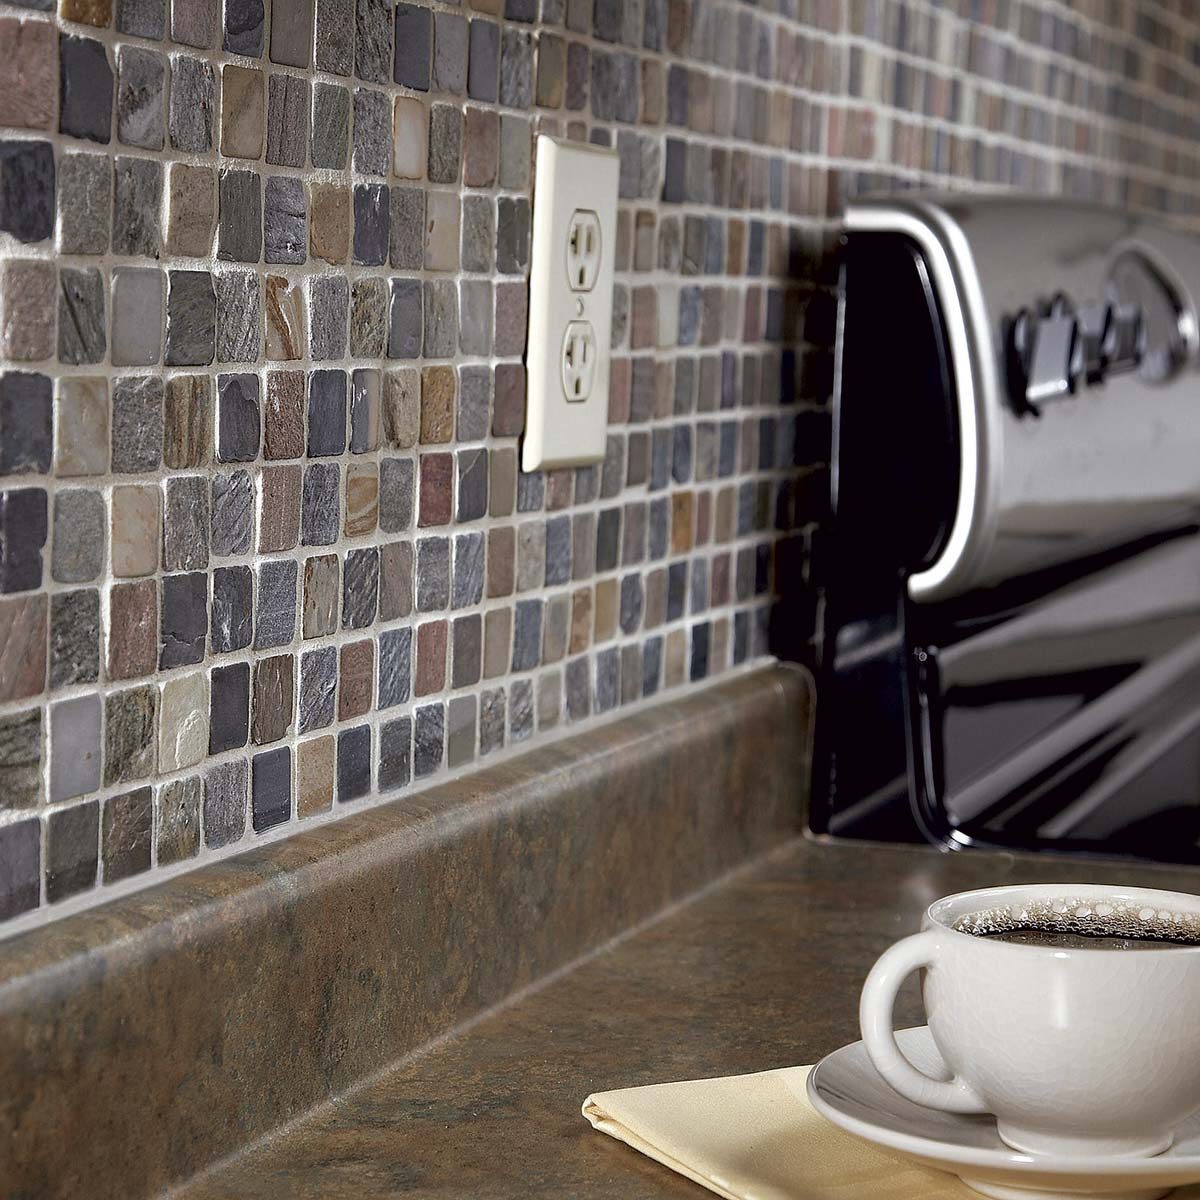
/ How To Put On Backsplash / My nekked kitchen windows from Thrifty Decor Chick / Shut off power to any nearby electrical outlets or light switches, then remove the cover plates.
How To Put On Backsplash / My nekked kitchen windows from Thrifty Decor Chick / Shut off power to any nearby electrical outlets or light switches, then remove the cover plates.
Insurance Gas/Electricity Loans Mortgage Attorney Lawyer Donate Conference Call Degree Credit Treatment Software Classes Recovery Trading Rehab Hosting Transfer Cord Blood Claim compensation mesothelioma mesothelioma attorney Houston car accident lawyer moreno valley can you sue a doctor for wrong diagnosis doctorate in security top online doctoral programs in business educational leadership doctoral programs online car accident doctor atlanta car accident doctor atlanta accident attorney rancho Cucamonga truck accident attorney san Antonio ONLINE BUSINESS DEGREE PROGRAMS ACCREDITED online accredited psychology degree masters degree in human resources online public administration masters degree online bitcoin merchant account bitcoin merchant services compare car insurance auto insurance troy mi seo explanation digital marketing degree floridaseo company fitness showrooms stamfordct how to work more efficiently seowordpress tips meaning of seo what is an seo what does an seo do what seo stands for best seotips google seo advice seo steps, The secure cloud-based platform for smart service delivery. Safelink is used by legal, professional and financial services to protect sensitive information, accelerate business processes and increase productivity. Use Safelink to collaborate securely with clients, colleagues and external parties. Safelink has a menu of workspace types with advanced features for dispute resolution, running deals and customised client portal creation. All data is encrypted (at rest and in transit and you retain your own encryption keys. Our titan security framework ensures your data is secure and you even have the option to choose your own data location from Channel Islands, London (UK), Dublin (EU), Australia.
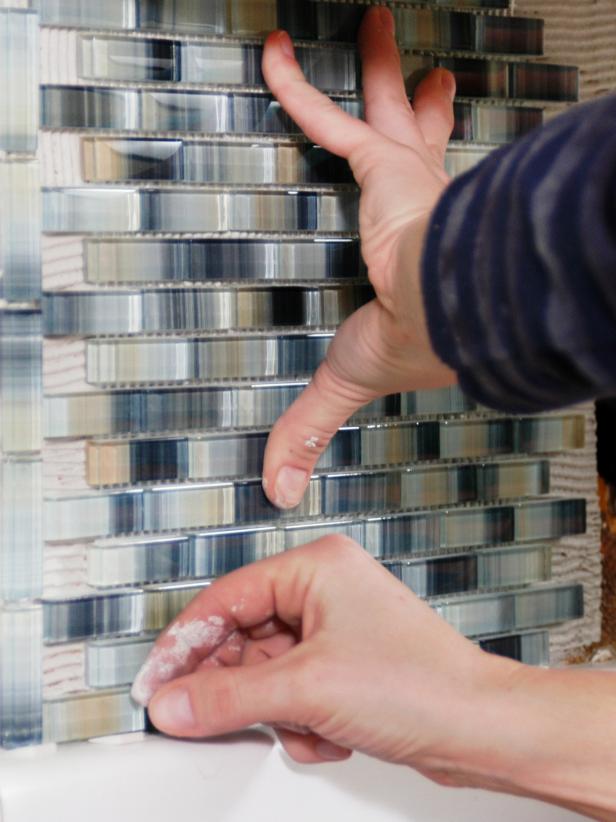
How To Put On Backsplash / My nekked kitchen windows from Thrifty Decor Chick / Shut off power to any nearby electrical outlets or light switches, then remove the cover plates.. Once the tile is in position, press it firmly in place by smoothing it with your hand. Thankfully, the process of applying a backsplash is easy. A beadboard backsplash is easy to install and instantly brightens your kitchen. Want a pallet wall look, without the upkeep? Here is the best way to apply a backsplash to your kitchen, using both traditional.
After removing them, place the screws and the covers in plastic bags so you don't lose any pieces. Adding a backsplash to your kitchen is a great way to create atmosphere with color and texture. 14 brilliant ideas for removable backsplashes saying goodbye to your old backsplash won't be difficult if you install one of these temporary yet timeless wall treatments in your kitchen. Home improvement can be messy business! Host paul wilson shows how to set a kitchen backsplash tile.
How to Cut Peel and Stick Smart Tiles Around an Electrical ... from i.ytimg.com After removing them, place the screws and the covers in plastic bags so you don't lose any pieces. Watch how easy it is to install your own peel and stick tile backsplash in a kitchen with sticktiles. Depending on your project, you could use one or several to achieve the look you're going for. Host paul wilson shows how to set a kitchen backsplash tile. Use liquid nails, and pay attention to the spacing to see if your tile and grout lines show through. Some types of trim are bullnoses, flat liners, chair rails, pencil liners, and so on. A kitchen backsplash tile adds utility and flair to your home. Use the mats on clean, flat, indoor surfaces such as backsplashes, countertops, and tub or shower walls.
Let's break down the process for grouting backsplash:
They have several shapes and types, so it can fit the style you desire. Beadboard is an inexpensive and easily accessible material. How to install a simple subway tile kitchen backsplash. Use a flathead screwdriver and unscrew the plastic covers from the outlets and light switches. Check out our guide to learn more about installing tile backsplash: Peel the backing off the next piece of tile, and place it beside the first piece making sure to align all the corners. Place the tape gently on the wet joint compound directly over the seam. Check the tile size against the wall and sand rough edges with sandpaper or a pumice stone. Let's break down the process for grouting backsplash: It needs pores to latch onto. Make sure the tile is lined up properly and perfectly straight before moving on. The adhesive used for tile installation does not stick well to glossy surfaces. Remove outlet and light switch covers.
The best way to prevent this is to seal your new grout and repeat as needed—every year or so for wall and floor tiles that don't get much moisture, and more often for grout in the shower or on. Check the tile size against the wall and sand rough edges with sandpaper or a pumice stone. Follow the manufacturer's instructions for installation details. If you do not have a border, being with the bottom row at the center mark, press the tiles firmly into place, placing spacers between each tile if required. Want a pallet wall look, without the upkeep?
How to Tile a DIY Backsplash | Family Handyman from www.familyhandyman.com If you have a vertical border row, start there and remember to put a spacer at the bottom to allow room for caulking (image 1). Tape off the existing countertop or backsplash and the underside of the cabinets to protect those surfaces. The adhesive used for tile installation does not stick well to glossy surfaces. Use the mats on clean, flat, indoor surfaces such as backsplashes, countertops, and tub or shower walls. If you want to install wall tiles around an electrical outlet, extend the outlet so it sits flush against the face of the new backsplash, rather than sinking into the wall. Using accent tile trims is the most common way to finish a kitchen backsplash edge. Adding a backsplash to your kitchen is a great way to create atmosphere with color and texture. Avoid squeezing the mastic into the joints.
Doing this would lead to an overly thick backsplash.
Continue in this way until you finish the backsplash. Tape off the existing countertop or backsplash and the underside of the cabinets to protect those surfaces. How to treat the exposed edge of a backsplash. Use your pencil line and bubble level to line the tile up in the middle of the backsplash, before pushing it into the mastic. Peel the backing off the next piece of tile, and place it beside the first piece making sure to align all the corners. Shut off power to any nearby electrical outlets or light switches, then remove the cover plates. Once the tile is in position, press it firmly in place by smoothing it with your hand. Set the tile in the cutter and adjust it to the desired measurement. Depending on the tile that is to be installed, and where it will be installed, it is sometimes approp. Mats don't replace waterproofing products for tile. Many tiles, such as stone and glass, do not have finished edge tiles that can complete a backsplash installation. A kitchen backsplash tile adds utility and flair to your home. Check out our guide to learn more about installing tile backsplash:
If planning to diy a solid brick or brick veneer backsplash, you may need to add to your toolset. Doing this would lead to an overly thick backsplash. After the tape is pushed into the compound, put a little more wet compound onto your putty knife and run it over the tape again. A kitchen backsplash tile adds utility and flair to your home. If they do, simply make the spaces smaller, or eliminate them altogether.
How to Install a Tile Backsplash | how-tos | DIY from diy.sndimg.com Want a pallet wall look, without the upkeep? Watch how easy it is to install your own peel and stick tile backsplash in a kitchen with sticktiles. If you have a vertical border row, start there and remember to put a spacer at the bottom to allow room for caulking (image 1). You want all the mesh to sink into the compound, creating a strong support when the compound dries. Depending on your project, you could use one or several to achieve the look you're going for. Home improvement can be messy business! You'll replace the covers once you've installed your backsplash. Host paul wilson shows how to set a kitchen backsplash tile.
Follow the manufacturer's instructions for installation details.
The adhesive used for tile installation does not stick well to glossy surfaces. This surface will be the foundation, which holds your beautiful backsplash together over the years, and a crumbling foundation will shorten the lifespan. This means that the raw edge of the. This will ensure that backsplash stays put for a long time. You want all the mesh to sink into the compound, creating a strong support when the compound dries. After removing them, place the screws and the covers in plastic bags so you don't lose any pieces. Set the tile in the cutter and adjust it to the desired measurement. A kitchen backsplash tile adds utility and flair to your home. Great for bathrooms and even decorative projects, just. The type of grout you should use largely depends on the gap size between tiles. Keep reading to learn the tips and eight easy steps you need from mr. A beadboard backsplash is easy to install and instantly brightens your kitchen. Depending on your project, you could use one or several to achieve the look you're going for.